Managing papers and notes: Zotero-Obsidian pipeline
Last updated:
Disclaimer: Setting up this pipeline is a bit tedious which is why I have decided to write it up. You may need to play around a bit to find the best method for your note-keeping system and style. Your mileage may also vary if the version numbers are different from mine. Please let me know if you run into issues.
- Zotero v7.0.2
- Better BibTex for Zotero v6.7.225
- DOI Manager v1.5.0
- Obsidian v1.6.7 (Installer v1.6.7)
- Admonition v10.1.1
- Advanced Tables v0.21.0
- Dataview v0.5.67
- Editor Syntax Highlight v0.1.3
- Find orphaned files and broken links v1.10.1
- Highlightr v1.2.2
- Iconize v2.14.3
- Minimal Theme Settings v8.1.1
- Recent Files v1.4.1
- Style Settings v1.0.9
- Templater v2.4.2
- Zotero Integration v3.2.1
PrefacePermalink
The motivation for this tutorial stems from the problem that I ran into while reading papers and writing notes in just a reference manager. Too many times would I read a paper and forget the content of the paper after a few days, often times being unable to recall the experiments, findings, or even the background information of a paper. In addition to this, there were many times where I will remember a piece of information but not be able to recall from which paper I read it from. The most difficult issue to solve was how I had trouble connecting ideas from different papers, especially if I couldn’t remember the author name or title that the ideas originated from.
The Zotero-Obsidian pipeline helps fix many of these issues. While tedious in its setup, not to mention writing up notes is more time-consuming than just highlighting a PDF file, I can say it is worthwhile in the long run. I find it helpful that I am making my own Wikipedia where I can search by topic and find relevant notes from various papers, rather than having to sift through papers to read notes.
Why you should have a reference managerPermalink
This section is more tailored to students (like high school students and undergrads) who are just getting into hitting the books and reading more papers that cover specialized topics. Hopefully, students who are further along in their research career will already have a reference manager to keep track of their notes.
But if you don’t have one, having a reference manager is a starting point to keeping track of papers that you’ve read. Most reference managers will let you directly write notes and highlight PDF file. This is a great way to take quick notes as you read papers.
However, once you have many papers to keep track of, linking ideas across different papers or even remembering the contents of a paper may become more difficult. This is where using Obsidian and implementing the Zettelkasten system
Obsidian to organize notes (Zettelkasten Method)Permalink
There are many YouTube and blog posts on the Zettelkasten method. I recommend looking it up as this is the note-taking method that I use for the following tutorial.
ResearchRabbit to find papersPermalink
Once you have your Zotero set up and have at least a few papers on there, I recommend using ResearchRabbit and link your Zotero library to this service. ResearchRabbit will be able to take a look at all of your references in your library or folder, and create a list of relevant papers that are not in your library.
Read more about ResearchRabbit on their official website here.
Note: there is a limit to how many papers ResearchRabbit will look at so breaking down your library into smaller subfolders by category may be helpful if you have a large collection. In my case, I currently have a folder for Pf phage papers, a folder for evolutionary game theory papers, a folder for cheater viruses, and a folder for clinically-relevant mutations in Pseudomonas aeruginosa. There is overlap between all folders but this helps cut down the number of papers ResearchRabbit can look through.
Download ZoteroPermalink
You can download Zotero for free from the Zotero website. The first 300 MB of storage is free, then you can pay to further increase storage space. You don’t necessarily need the extra storage if you are okay with saving everything on just your local computer and not have an online storage space as backup. The space quota is for the online sync storage space, which is nice to have as a safety net.
Zotero is made by a nonprofit and is open-source, which means users can volunteer to contribute and provide add-ons that enhance your experience. This includes add-ons that makes it easier to import notes and metadata into Obsidian.
SettingsPermalink
The following are the plugins that I have installed on Zotero:
Zotero v7.0.2:
- Better BibTex for Zotero v6.7.225
- DOI Manager v1.5.0
These plugins help me import metadata from Zotero, including but not limited to author names, journal name, year published, abstract, etc. The plugins also help me import any highlights and notes that I made on the PDF file. These include words highlighted using the highter (including the color that I used), as well as figures that I’ve circled with the “Area” tool and notes I’ve written with the “Post-it” tool.
Download ObsidianPermalink
Obsidian can be downloaded for free from the official Obsidian website. Once you have that downloaded, I put my Obsidian folder under my Documents folder and created a vault called “Literature Notes”. You can name your vault anything. I keep ALL of my reference notes in one vault.
SettingsPermalink
The following are the community plugins that I have installed into Obsidian.
Obsidian v1.6.7 (Installer v1.6.7)
- Admonition v10.1.1
- Advanced Tables v0.21.0
- Dataview v0.5.67
- Editor Syntax Highlight v0.1.3
- Find orphaned files and broken links v1.10.1
- Highlightr v1.2.2
- Iconize v2.14.3
- Minimal Theme Settings v8.1.1
- Recent Files v1.4.1
- Style Settings v1.0.9
- Templater v2.4.2
- Zotero Integration v3.2.1
The bolded plugins are required or highly recommended. The other plugins are optional and not necessary for the purposes of this tutorial.
In addition to this, make sure that under the “Core plugins” tab that the following plugins are turned on:
- Backlinks
- Command palette
- File recovery
- Graph view
- Note composer
- Outgoing links
- Page preview
- Quick switcher
- Search
- Templates
For the Templates core plugin, make sure to either click the gear icon next to it or click on the Templates tab on the left and type “templates” for “Template folder location”:

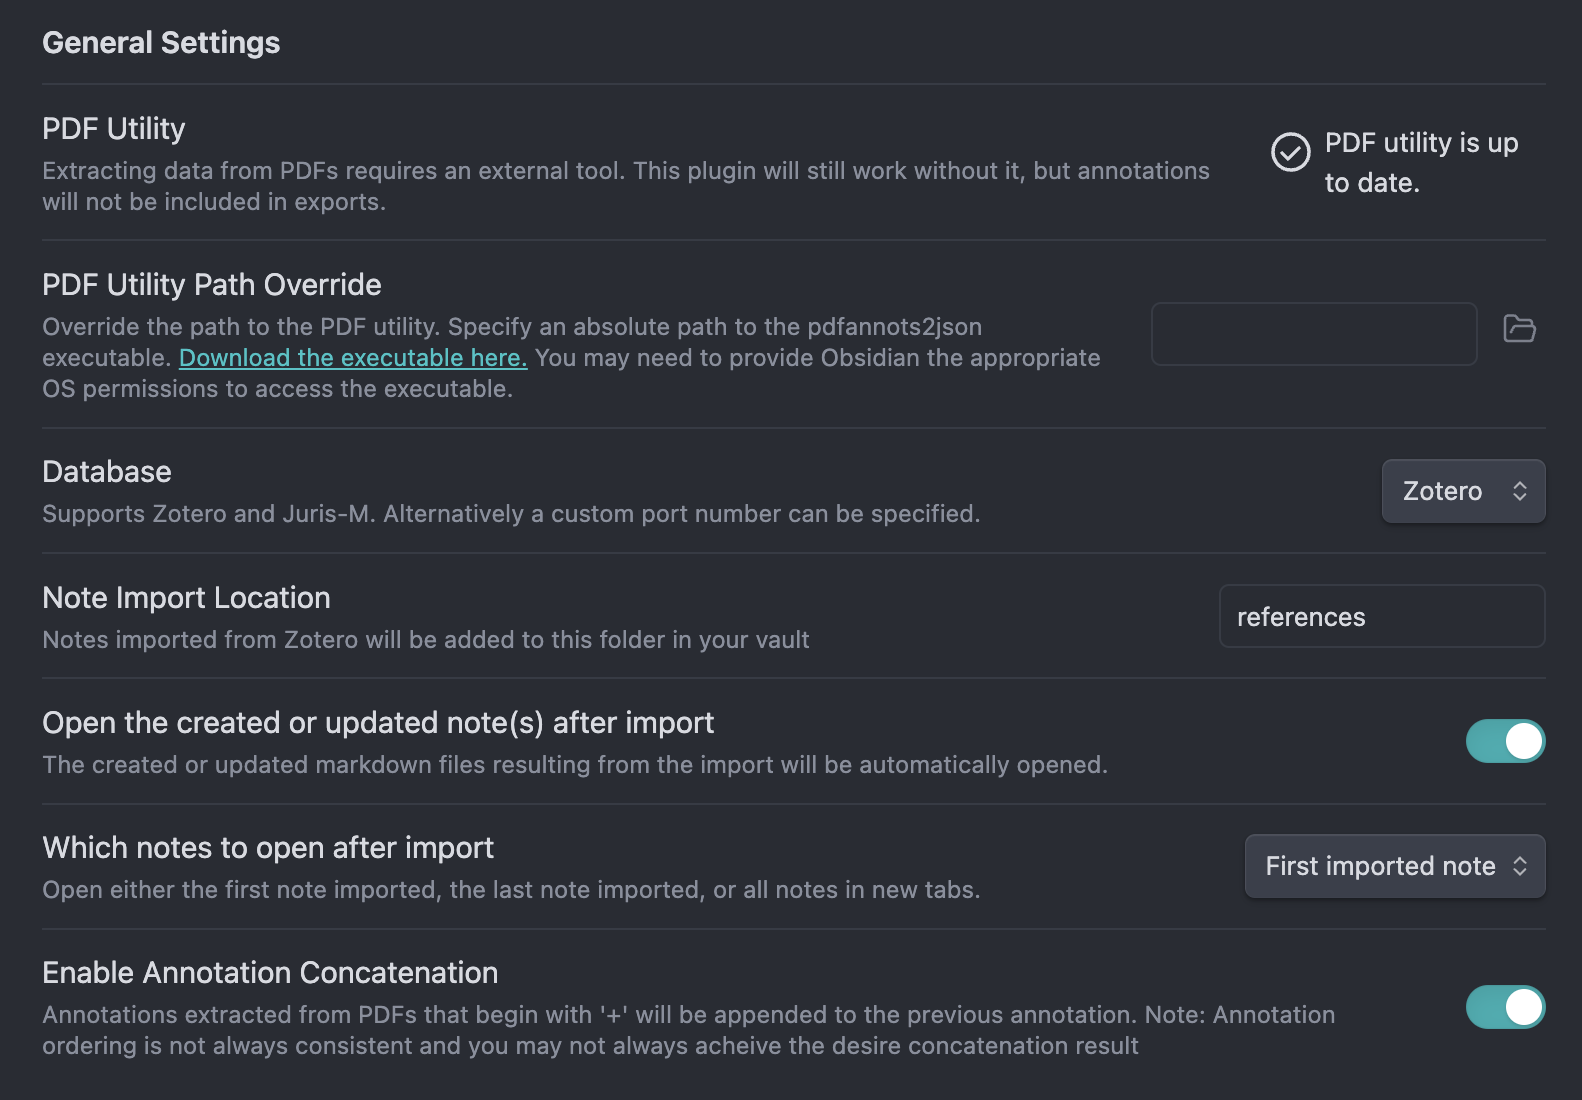
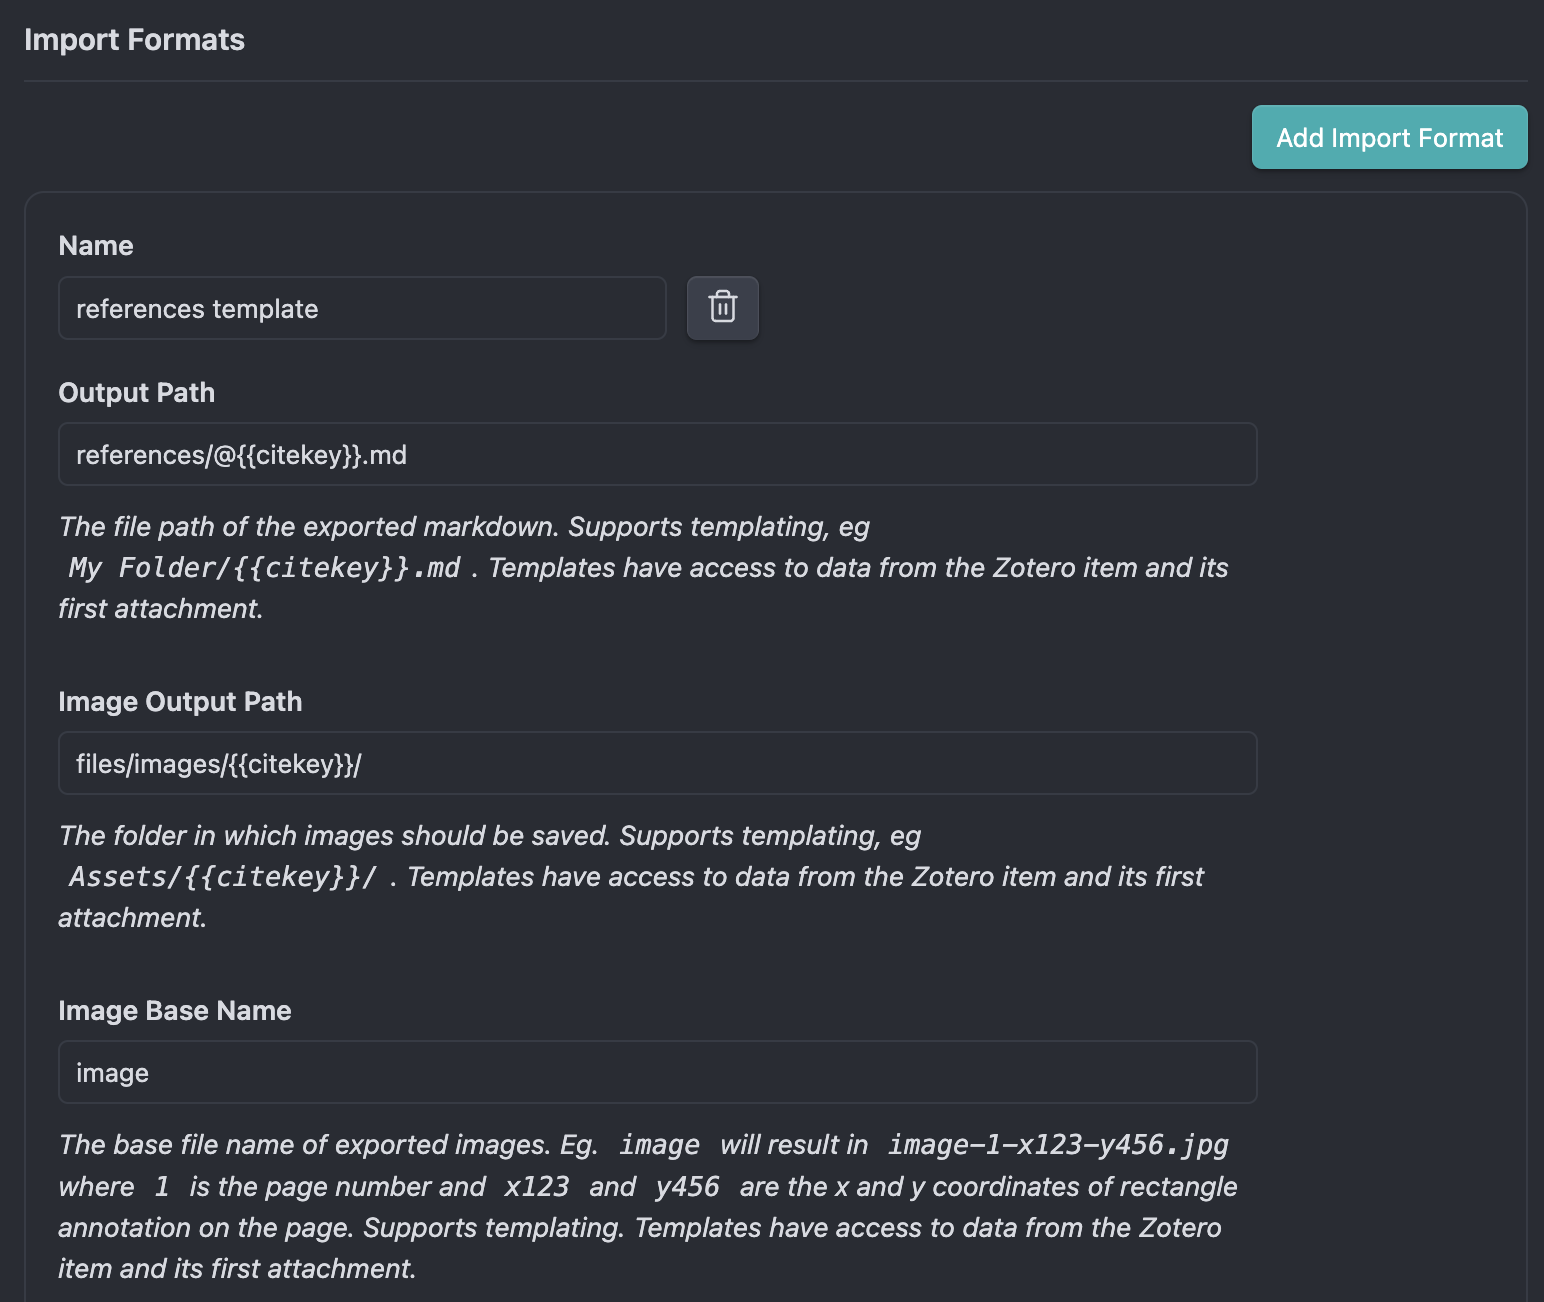
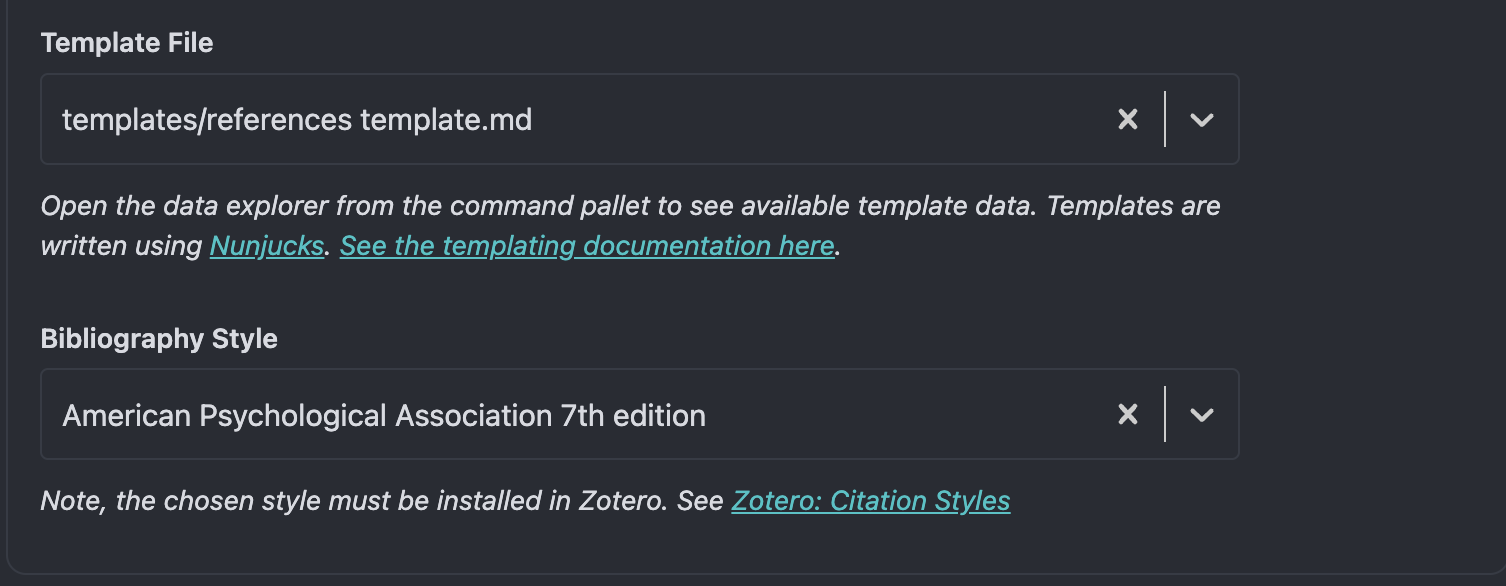
For the Zotero Integration community plugin, make sure to set the following settings:


Scripts and templatesPermalink
Under your vault folder (in my case, it will be “Literature Notes”), make a folder named “templates” and add the following markdown files in the templates folder (make sure to remove the underscore in the filename when saving to your computer):
The template above will help extract and format your reference metadata and your notes/idea into a standardized format. Feel free to customize the templates to suite your needs.
To get the highlighter color to translate from Zotero to Obsidian, download the following CSS file (make sure to remove the underscore in the filename when saving to your computer):
Save the css file under “Literature Notes” > “.obsidian” > “snippets”. The “.obsidian” folder is hidden folder at least on Mac, so make sure that you are able to see hidden folders by doing Command + Shift + . (period) in Finder. If there is no “snippets” folder, make sure that all Obsidian plugins are installed before proceeding.
Reference templatePermalink
The reference template will allow you to seamlessly import metadata and your notes (including text that you highlighted) from Zotero into Obsidian.
highlighterPermalink
I like to use different highlighter colors in Zotero to signify different things as I am reading a paper. For example, for general portions of the text that I find important, I will use the yellow highlighter. For really important information, I use the red highlighter. For terminology or explanation of abbreviations, I use green. Blue is reserved for methods or hypotheses that the authors used for the paper. And the purple color is for miscellaneous pieces of information, such as cited references that I would like to go back and read further.
Since setting up my Zotero-Obsidian pipeline, Zotero has increased the number of colors that can be used. To customize what each highlighter color means and its corresponding icon when importing to Obsidian, edit the callouts.css file as needed.
CSSPermalink
The CSS allows Obsidian to take your Zotero highlights and highlight color from the PDF and convert them into text blocks with the appropriate color. This script is needed for the reference template to work properly. Otherwise, Obsidian will not know what color to make the text block based off of the highlighter color.
The css file needs to be within a hidden folder in your vault named, “.obsidian” > “snippets”. In your snippets folder, create a “callouts.css” with the following in the css file:
/* Yellow */
.research-note
.callout[data-callout-metadata="#ffd400"] {
  --callout-color: 255, 212, 0 !important;
}
.callout[data-callout="yellow"] {
  --callout-color: 255, 212, 0 !important;
  --callout-icon: lucide-star;
}

/* Red */
.research-note
.callout[data-callout-metadata="#ff6666"] {
  --callout-color: 255, 102, 102 !important;
}
.callout[data-callout="red"] {
  --callout-color: 255, 102, 102 !important;
  --callout-icon: lucide-alert-circle;
}

/* Orange */
.research-note
.callout[data-callout-metadata="#f19837"] {
  --callout-color: 241, 152, 55 !important;
}
.callout[data-callout="orange"] {
  --callout-color: 241, 152, 55 !important;
  --callout-icon: lucide-quote;
}

/* Green */
.research-note
.callout[data-callout-metadata="#5fb236"] {
  --callout-color: 95, 178, 54 !important;
}
.callout[data-callout="green"] {
  --callout-color: 95, 178, 54 !important;
  --callout-icon: lucide-book-open;
}

/* Blue */
.research-note
.callout[data-callout-metadata="#2ea8e5"] {
  --callout-color: 46, 168, 229 !important;
}
.callout[data-callout="blue"] {
  --callout-color: 46, 168, 229 !important;
  --callout-icon: lucide-flask-conical;
}

/* Pink */
.research-note
.callout[data-callout-metadata="#e56eee"] {
  --callout-color: 229, 110, 238 !important;
}
.callout[data-callout-metadata="pink"] {
  --callout-color: 229, 110, 238 !important;
  --callout-icon: lucide-quote;
}

/* Purple */
.research-note
.callout[data-callout-metadata="#a28ae5"] {
  --callout-color: 162, 138, 229 !important;
}
.callout[data-callout="purple"] {
  --callout-color: 162, 138, 229 !important;
  --callout-icon: lucide-quote;
}

/* Grey */
.research-note
.callout[data-callout-metadata="#aaaaaa"] {
  --callout-color: 170, 170, 170 !important;
}
.callout[data-callout="grey"] {
  --callout-color: 170, 170, 170 !important;
  --callout-icon: lucide-quote;
}
Notes templatesPermalink
I use the “Notes” template to create a file on a certain terminology. This is different from my “Idea” template which I use for more conceptual notes that are usually a sentence long. Think of a “Notes” file as an entry on Wikipedia. It is usually a webpage on a topic with various subsections and contains links to other pages.
The notes files are especially useful if you quickly want to find relevant ideas/concepts on the topic or references on the topic.
Idea templatesPermalink
The idea template is used to create more conceptual notes. For example, if I read a paper and wanted to write down a concept such as “Pyocyanin can function as an electron transfer facilitator to increase ATP production in an anoxic environment”, I can use the idea template to create a file with this title and link it back to the paper that this concept came from.
This way, when I open the reference page that I created in Obsidian, I can quickly see the different notes and ideas discussed in the paper. Likewise, if I see the idea file, I can quickly figure out which paper this concept came from.
Additionally, I can link other concepts and notes to this idea page so that this page will appear whenever I am on a related page.
Links and tagsPermalink
When you first start using Obsidian, you may be confused what links and tags are and how they are different. Links are used to connect documents (references, notes, and ideas) with other related documents. Linking documents will help make connections in your graph, and will later help you link ideas from different papers together.
Tags are used to categorize documents by document type. For example, I categorize documents either as reference, note, or idea. You may use your own system but this categorization has helped me navigate my notes better.
- reference: used to tag documents that contain metadata from papers imported from Zotero.
- note: a word/terminology (think words found in dictionaries or Wikipedia pages)
- idea: a sentence that condenses a concept or idea or fact, either from literature or my own ideas/hypotheses
- I further differentiate my ideas from others by adding a question mark emoji at the start of the document title and by adding a question mark tag.
Graph viewPermalink
Once you start linking your references with your notes and ideas, as well as linking notes to ideas, Obsidian will begin making a web-like graph that shows the connections between linked documents (i.e. nodes). You can view your graph by opening “graph view” (there is a button located on the left).
To color your nodes by category (references, ideas, and notes), you can pick a color under the Groups dropdown menu and select your category. Note that the order of your subgroups are important in that the subgroups at the top will be prioritized in the event that the node falls into multiple categories.
To hide your template documents from showing up as nodes, add this to the search bar:
-path:templates -path:search
These will hide your documents under your templates folder.
Import your first referencePermalink
Now you are ready to import your first reference paper from Zotero to Obsidian! First, make sure that Zotero is also running. Then in Obsidian, open the Command palette by doing Command + P (you will need to toggle on the core plugin to use this shortcut). Then start typing “Zotero Integration”, and you should hopefully see your reference template pop up as an option.
Pick the paper that you want to import and hit enter. Your reference should be imported!
Create a new note/idea pagePermalink
In Obsidian, create a new file via Command + N. Type in the title on the file and then open the Command palette (Command + P). Type in “templates: Inset template” and click on either the idea or note template.
You can also make a new note by creating a new link within another file. To do so, write the note within two square brackets “[[Example title here]]”. Then, click on the link and this should create a new file for you. Then in the Command palette, type in “templates: Inset template” and click on either the idea or note template.